With this Swift programming tutorial I will continue working with Firebase Social Authentication and this time I will share with you how to implement Sign-in with Facebook account. If you are interested in learning how to use Firebase Social Authentication to implement Sign-in with Google account please check my previous tutorial.
Create New or Open Existing Xcode Project
In my previous tutorial where I shared how to implement SignIn with Google account, I have created a very simple app with two views. One view with a login button and another view is a protected page which will open once the user authentication is successful. You can create this Xcode project with two views yourself of you can refer to my previous tutorial to see how I created a new Xcode project.
Create New or Open Existing Firebase App
Just like with Xcode project, in my previous tutorial I have create a new Firebase App to be used for Social Authentication functionality. In this tutorial I am going to continue using that Firebase app. If you followed my previous tutorial on Google Sign, then I am sure you would like to continue with existing Firebase app. Other wise, please refer to my previous tutorial to learn how to create a new Firebase app and how to add Firebase support to your iOS project
Create New Facebook App
To integrate Facebook Sign-in into your app follow the below steps:
- Go to Facebook Developers website and open Apps Dashboard. You can open Facebooks Apps Dashboard by clicking on this URL: https://developers.facebook.com/apps
- On the Apps Dashboard page click on Add a New App button,
- Give your app a new name and click on Create App ID button. I gave my app this name “Firebase Social Authentication”.
- Once the app is created Do not select a product on the Select Product page but rather click on the Settings link which is on the left side navigation menu.
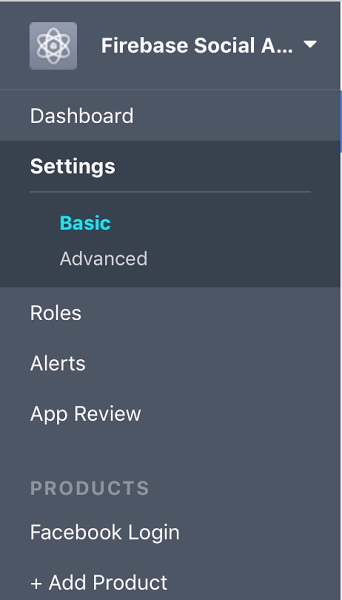
- Then, click Add Platform at the bottom of the page and select iOS,
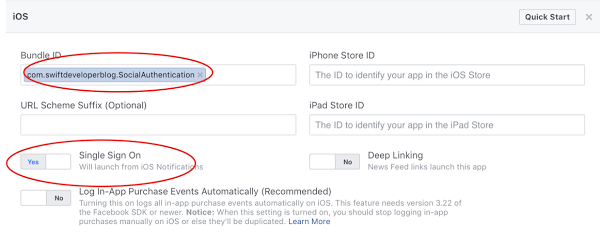
- Now open your Xcode project by clicking on .xcworkspace, select project name, then Targets -> General and from the General tab copy the Bundle Identifier value. Paste the value of Bundle Identifier into Bundle ID text field as on the picture below,
- Then turn on Single Sign On and click on Save Changes
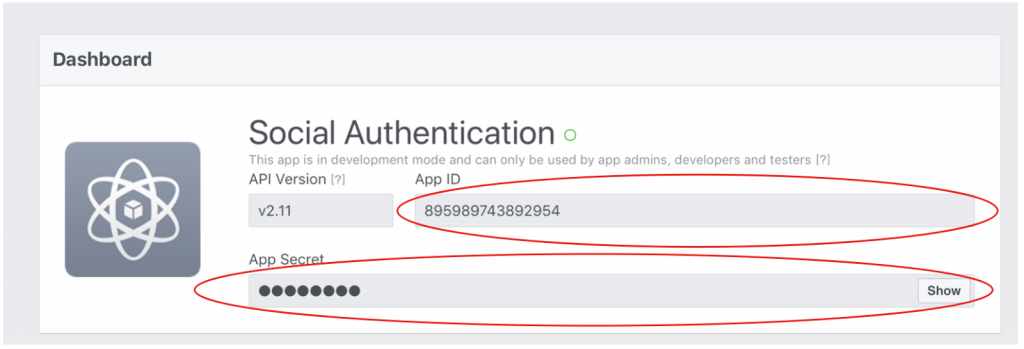
From Facebook App project Dashboard you need to copy the App ID and App Secret
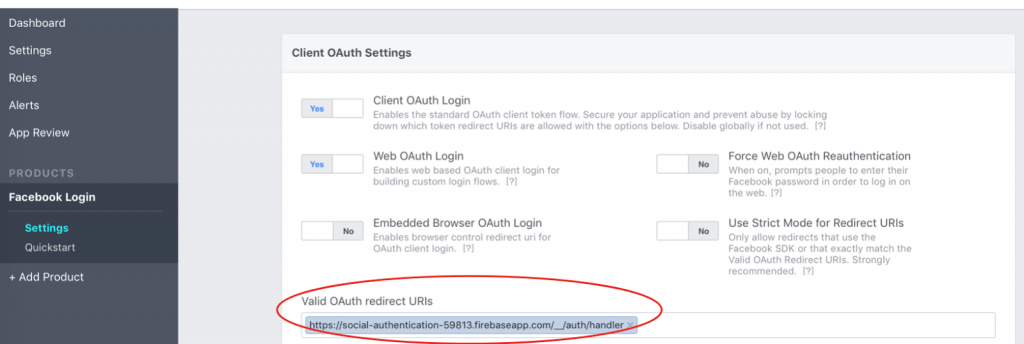
and then head over to the Firebase Console, go to the Authentication page and click on the Sign-In methods and enable Facebook. Now copy the OAuth redirect URI

And go back to your Facebook App on Facebook Apps Dashboard, click on your app to open and in your left navigation menu in the Products section-> Facebook Login -> Settings you have to paste the URI as it is shown on the picture below:
Adding Firebase Facebook Dependencies
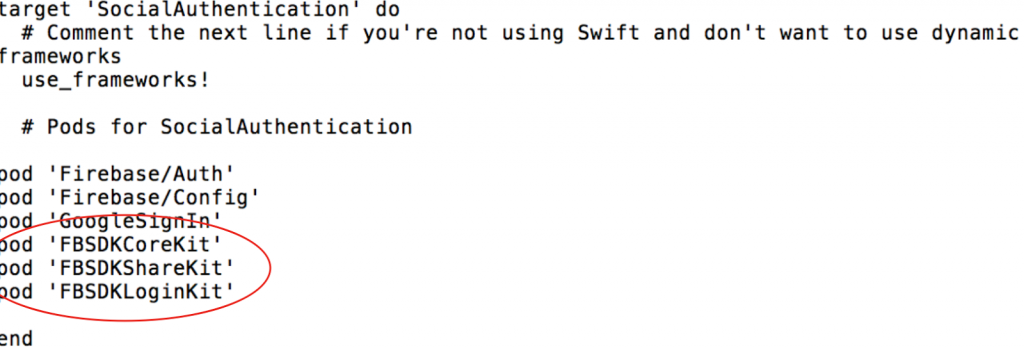
To let users Sign-in with their Facebook account to our app we will need to add Facebook Sign-in library dependency to our Xcode project. And since we’ve started using Pods as dependency management we will use Pods once again to add the a few Facebook libraries: pod ‘FBSDKCoreKit’, pod ‘FBSDKShareKit’ and pod ‘FBSDKLoginKit‘ before the end of your file.
- Open the terminal and go to your project root directory.
- Then, in terminal window enter the following command open Podfile. In the podfile you have to add 2 new lines just like in the image below.
- Save the pod file
- Now, after you saved the pod file file, type in terminal window the pod install command.
Remember that after you started using Pods to manage the libraries dependency for your project you will need to be opening your project using the .xcworkspace rather than .xcodeproj.
Open the .xcworkspace and build it to make sure everything is ok. Then you go to the info.plist file, open it as a source code and add the following sequence by changing the [APP_ID] and [APP_NAME] with the app id and app name you got earlier from the Project Dashboard on Facebook for Developers page.
<key>CFBundleURLTypes</key>
<array>
  <dict>
  <key>CFBundleURLSchemes</key>
  <array>
    <string>fb[APP_ID]</string>
  </array>
  </dict>
</array>
<key>FacebookAppID</key>
<string>[APP_ID]</string>
<key>FacebookDisplayName</key>
<string>[APP_NAME]</string>
Swift Code to Add the Login with Facebook Account Feature
Then you go to the AppDelegate file. Here you have to import FBSDKCoreKit then you have to instantiate the FBSDKApplicationDelegate and then configure facebookAuthentication in the func application(_ app: UIApplication, open url: URL, options: [UIApplicationOpenURLOptionsKey : Any] = [:]) -> Bool.
My source code is below. If you did not follow my previous tutorial about Google Sign in then simply delete Google related lines.
var window: UIWindow?

func application(_ application: UIApplication, didFinishLaunchingWithOptions launchOptions: [UIApplicationLaunchOptionsKey: Any]?) -> Bool {

    FirebaseApp.configure()

    FBSDKApplicationDelegate.sharedInstance().application(application, didFinishLaunchingWithOptions: launchOptions)

    GIDSignIn.sharedInstance().clientID = FirebaseApp.app()?.options.clientID
    GIDSignIn.sharedInstance().delegate = self

    return true
}

func application(_ app: UIApplication, open url: URL, options: [UIApplicationOpenURLOptionsKey : Any] = [:]) -> Bool {
    let googleAuthentication = GIDSignIn.sharedInstance().handle(url, sourceApplication:options[UIApplicationOpenURLOptionsKey.sourceApplication] as? String, annotation: [:])

    let facebookAuthentication = FBSDKApplicationDelegate.sharedInstance().application(app, open: url, sourceApplication: options[UIApplicationOpenURLOptionsKey.sourceApplication] as! String, annotation: options[UIApplicationOpenURLOptionsKey.annotation])


    return facebookAuthentication || googleAuthentication
}
Add Facebook Login Button
Now it’s time to add the actual Facebook log in button so you need to head over to the ViewController file and create a new private function to configure the button.
In this function you need to create the button, set its frame, add it to the view, assign the ViewController as its delegate and conform the ViewController to the FBSDKLoginButtonDelegate by implementing its delegate methods.
In the loginButton method you have to check for errors and if there aren’t any errors you need to create credentials with the FacebookAuthProvider. Then, you have to authenticate by using this credential.
//creating the Facebook sign in button
fileprivate func configureFacebookSignInButton() {
    let facebookSignInButton = FBSDKLoginButton()
    facebookSignInButton.frame = CGRect(x: 120, y: 200 + 100, width: view.frame.width - 240, height: 40)
    view.addSubview(facebookSignInButton)
    facebookSignInButton.delegate = self
}

//FBSDKLoginButton delegate methods
    func loginButton(_ loginButton: FBSDKLoginButton!, didCompleteWith result: FBSDKLoginManagerLoginResult!, error: Error!) {
        if error == nil {
            print("User just logged in via Facebook")
            let credential = FacebookAuthProvider.credential(withAccessToken: FBSDKAccessToken.current().tokenString)
            Auth.auth().signIn(with: credential, completion: { (user, error) in
                if (error != nil) {
                    print("Facebook authentication failed")
                } else {
                    print("Facebook authentication succeed")
                }
            })
        } else {
            print("An error occured the user couldn't log in")
        }
    }

    func loginButtonDidLogOut(_ loginButton: FBSDKLoginButton!) {
        print("User just logged out from his Facebook account")
    }
Then you go to the info.plist file and you add a new URL Scheme with the value of “fb{AppID}”.
![]()
Now you’re all set up and can run your application and log in by using Facebook.
I hope this tutorial was helpful for you!
If you are interested in learning more about Firebase checkout out the below video courses which will definitely help you speed up your learning progress and help you develop your app with Swift and Firebase faster.
Building Mobile Apps for iOS with Swift and Firebase – Video Courses
Building Mobile Apps for iOS with Swift – Books