In this video tutorial I am going to share with you how to add Deep Linking support for your app using Custom URL Scheme.
There is also another way of implementing deep linking for your app and it is called Universal Linking which I will also share with you in one of my next videos. So, stay tuned and subscribe to be notified when a new video becomes available.
Deep Linking With Custom URL Scheme – Video Tutorial
Custom URL Scheme
Think of custom url scheme name as another unique protocol of the address you can come up for your app. For example, an address of subscribe page of this web site is:
http://swiftdeveloperblog.com/subscribe
where http is a protocol,
swiftdeveloperblog.com – is the host,
and /subscribe – is the path.
In the case of custom url schema name http will be replaced with the another unique name you create. For example in my case it is “SwiftDeveloperBlogDeepLink” and complete custom url scheme in my case looks like this:
SwiftDeveloperBlogDeepLink://swiftdeveloperblog.com/inner
where SwiftDeveloperBlogDeepLink – is the scheme name,
swiftdeveloperblog.com – is the host name,
inner – is the path.
Or it could be swt://swiftdeveloperblog.com/inner
Do you see the similarity?
Update your info.plist file
The very first step to add deep linking support for our app will be to update our info.plist file. You can update the file by following the instructions in my video or open it as a source file and paste the following code snipped either at the top of the document(right after the opening <dict> tag) or at the bottom of your document(right before the </dict></plist> tags).
<key>CFBundleURLTypes</key>
<array>
 <dict>
  <key>CFBundleURLSchemes</key>
  <array>
   <string>SwiftDeveloperBlogDeepLink</string>
  </array>
  <key>CFBundleURLName</key>
  <string>com.kargopolov.CodeExamples</string>
 </dict>
</array>
Replace the value of CFBundleURLSchemes which is in my case “SwiftDeveloperBlogDeepLink” with a unique deep link url scheme that will make sense for your app. Just remember to make it short and unique. And replace the value of CFBundleURLName with a value of Bundle Identifier of your app. You can check the video on how I do it.
Update AppDelegate.swift file
For your app to be able to listen to custom url schema clicks you will need to add the below function to your AppDelegate.swift file. This function is part of UIApplicationDelegate protocol.
func application(_ application: UIApplication, open url: URL, sourceApplication: String?, annotation: Any) -> Bool {

        print("url \(url)")
        print("url host :\(url.host!)")
        print("url path :\(url.path)")


        let urlPath : String = url.path as String!
        let urlHost : String = url.host as String!
        let mainStoryboard: UIStoryboard = UIStoryboard(name: "Main", bundle: nil)

        if(urlHost != "swiftdeveloperblog.com")
        {
            print("Host is not correct")
            return false
        }

        if(urlPath == "/inner"){

            let innerPage: InnerPageViewController = mainStoryboard.instantiateViewController(withIdentifier: "InnerPageViewController") as! InnerPageViewController
            self.window?.rootViewController = innerPage
        } else if (urlPath == "/about"){

        }
        self.window?.makeKeyAndVisible()
        return true
    }
To compile the code snippet about you will need to either create a new ViewController named “InnerPageViewController” and assign it an Identifier “InnerPageViewController” or edit this code to use a name of one of your existing view controllers.
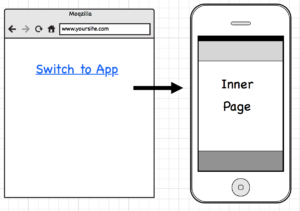
And this is basically it. For the code about to work and open the inner page of my app when user clicks on a link in mobile browser, I need to create a link that will look like this:
<a href="SwiftDeveloperBlogDeepLink://www.swiftdeveloperblog.com/inner">Click here to switch to app</a>
where
- “SwiftDeveloperBlogDeepLink” – is the custom URL Scheme name,
- “swiftdeveloperblog.com” – is the host name, which can be any other name you can come up with and use in the app’s business logic,
- “inner” – is the custom schema url path which I used to compare and make decision which page to open for user.
Hope this video tutorial was helpful!
Happy learning!